Collaborated BIM Modeling : Wall Opening – How to make wall opening in host model with linked model
In the previous article – Clash Ball – How to see Navisworks Clash results in Revit (Link) –, we looked at what software is widely used in the BIM industry.
BIM authoring tools, such as Revit, often work with multiple models by each team of disciplines organized by work splits and efficient management. In addition, the project members constantly link the models from different teams to their host model for design collaboration and clash checks.
What I will show in this article is a situation between ‘Host model: Architecture’ and ‘Linked model: Structure model’. If there are many structural beams of linked models that penetrate the walls of the host model, the walls and beams have problems with interference (Clash), and it is cumbersome to modify the wall profile one by one or to create fit openings into each beam size. So, I would like to introduce creating the openings in the wall using Dynamo.
To create the Dynamo script of this content is simpler than the Dynamo script of the previous article, however, it is more advanced working process to collaborate BIM Modeling. So you need to fully understand the BIM model coordination enough. Let me begin.
Here is the software version I used in this article.
- Revit version 2021,
- Dynamo 2.6.1.
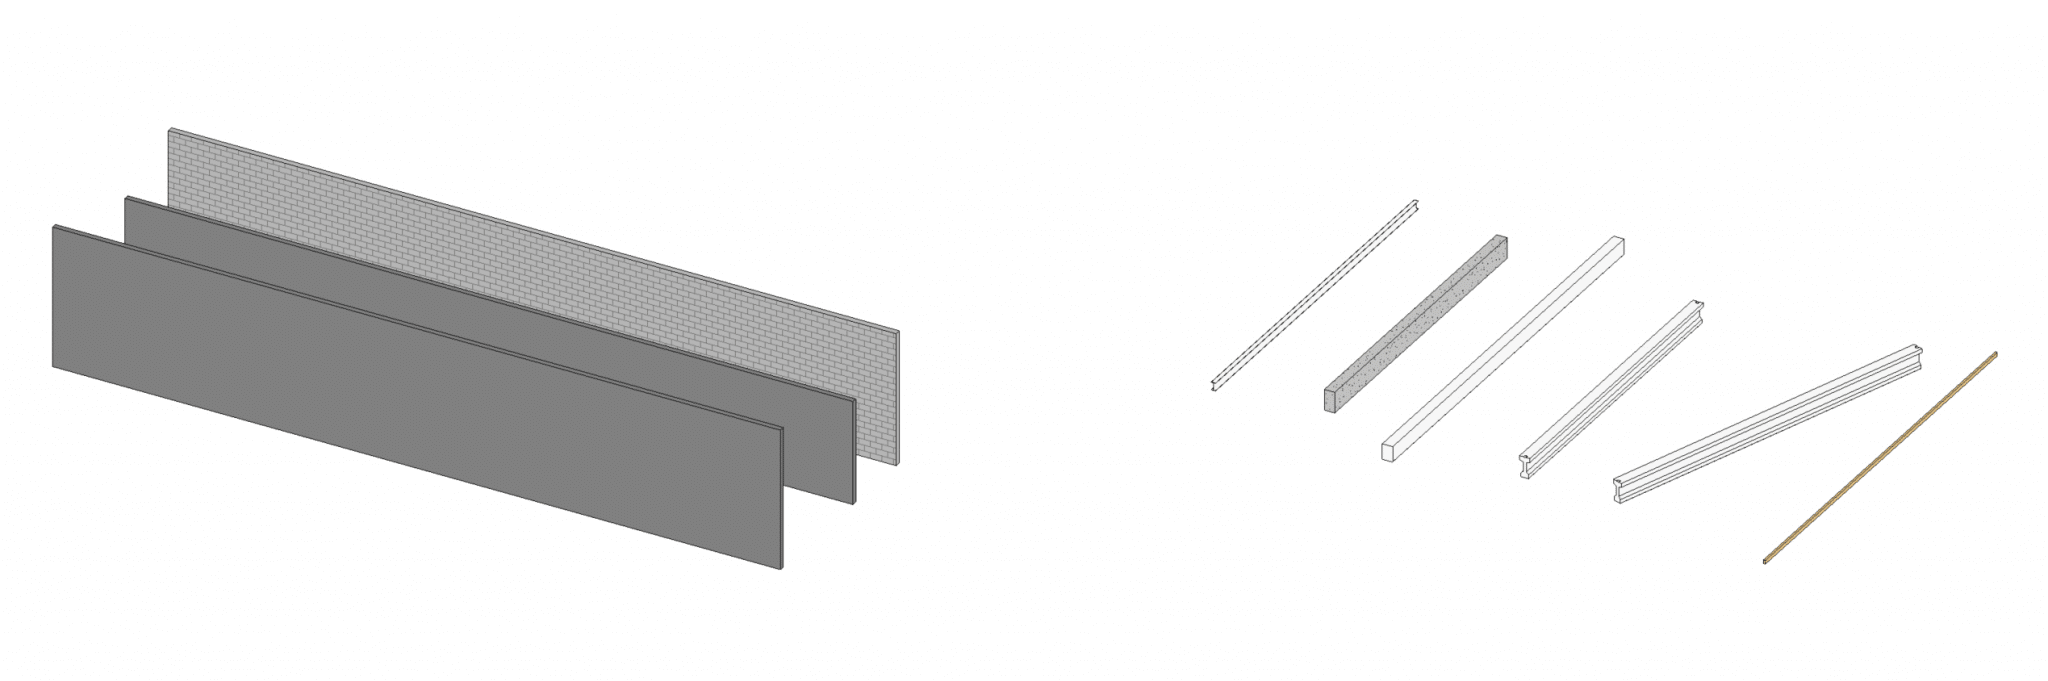
In this work, I only created very simple walls and beams in each host model and linked model.
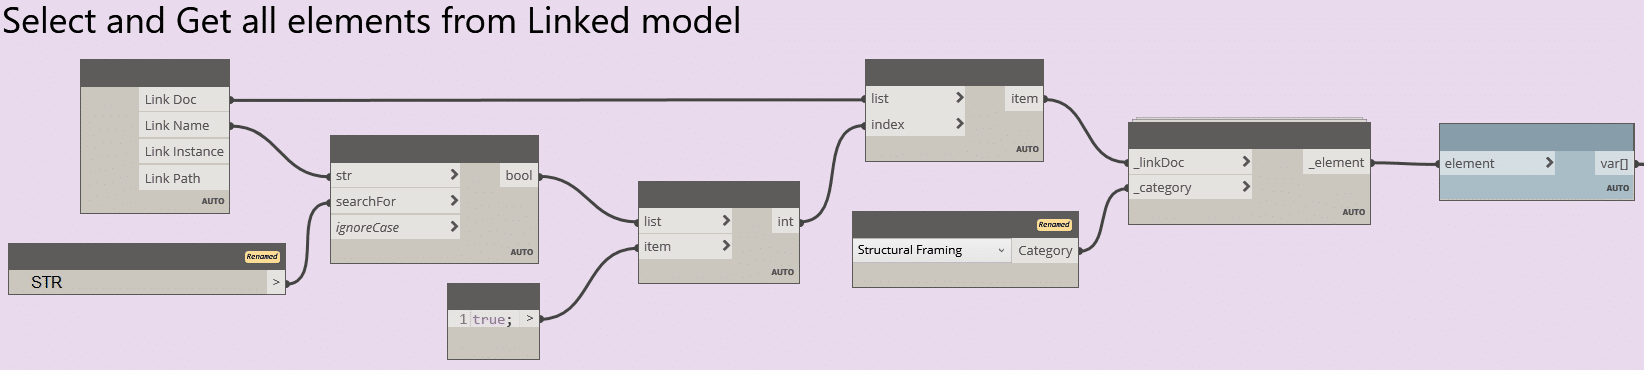
Select Linked Model and Get its elements
As you can see below a part of Dynamo script ‘Figure 3’, If you have multiple linked models, you can select only the model you need through a specific word, and you can extract data from the desired element from that model.
Also, the pink background group is working to get Geometries (Data) from the host model. (Figure 4)

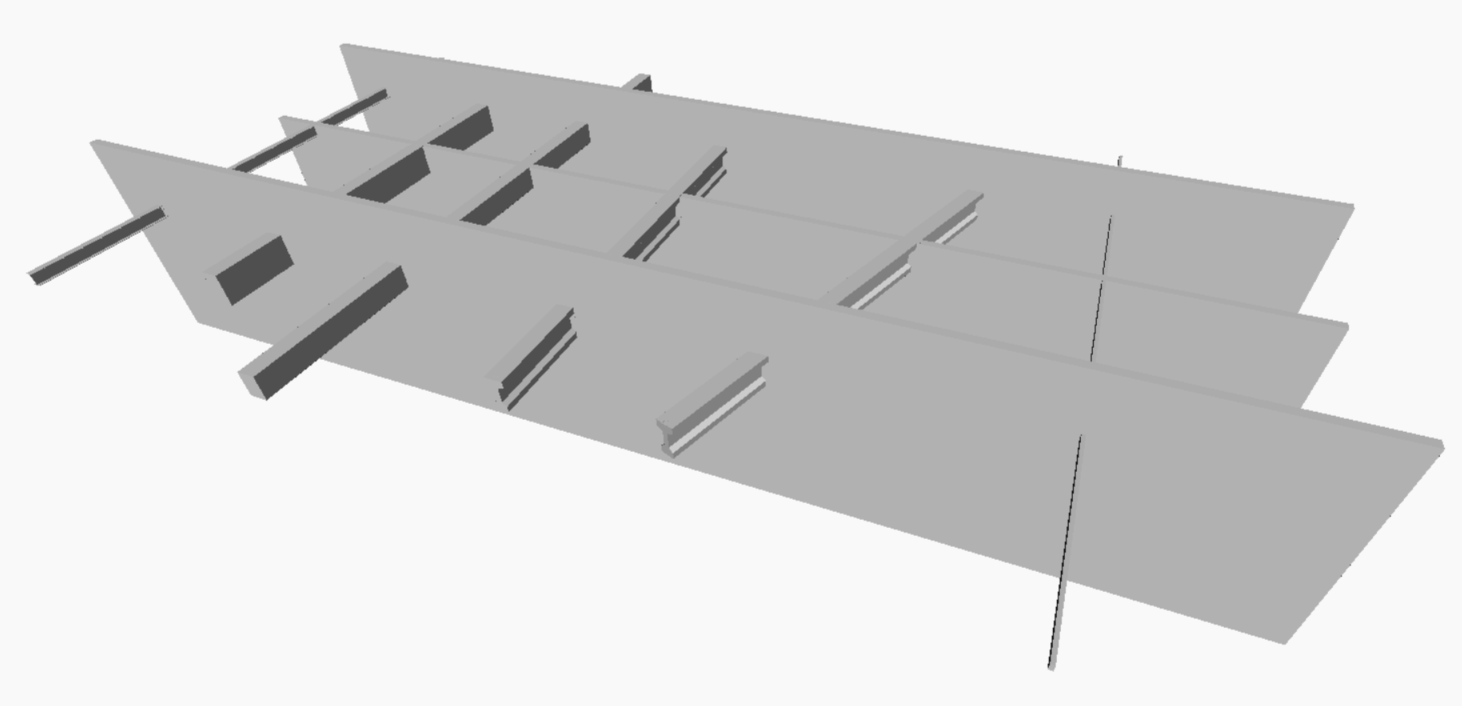
Here is the view to transfer Revit elements to Dynamo Geometries. (Figure 5)
Using the transferred data, I can proceed to analyze there is interference between the host model and the linked model or not and extract the data of the location of the interference, the proper size of the opening and create the openings.
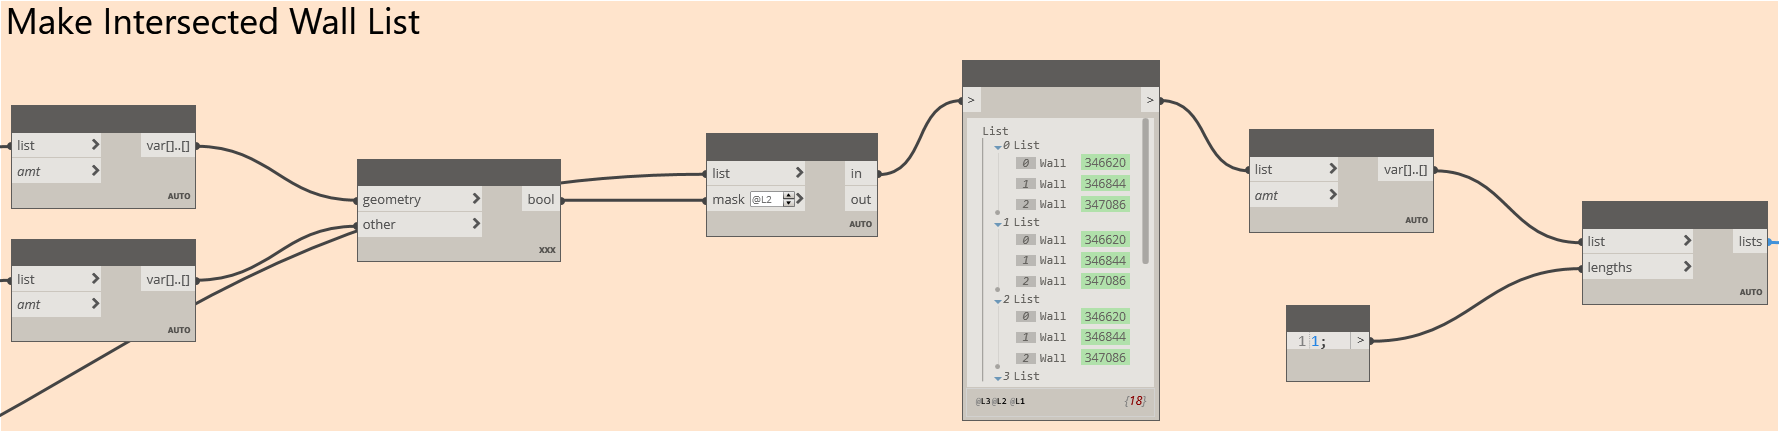
Make Intersected Wall List
This is a Dynamo script ‘Figure 6’ that creates a list by identifying the intersection between the Beam elements in the link model and the Wall elements in the host model we extracted just before.
The reason for doing this is to accurately identify the beams and walls that cause the interference and to list the wall elements that match the interfering beams in order.
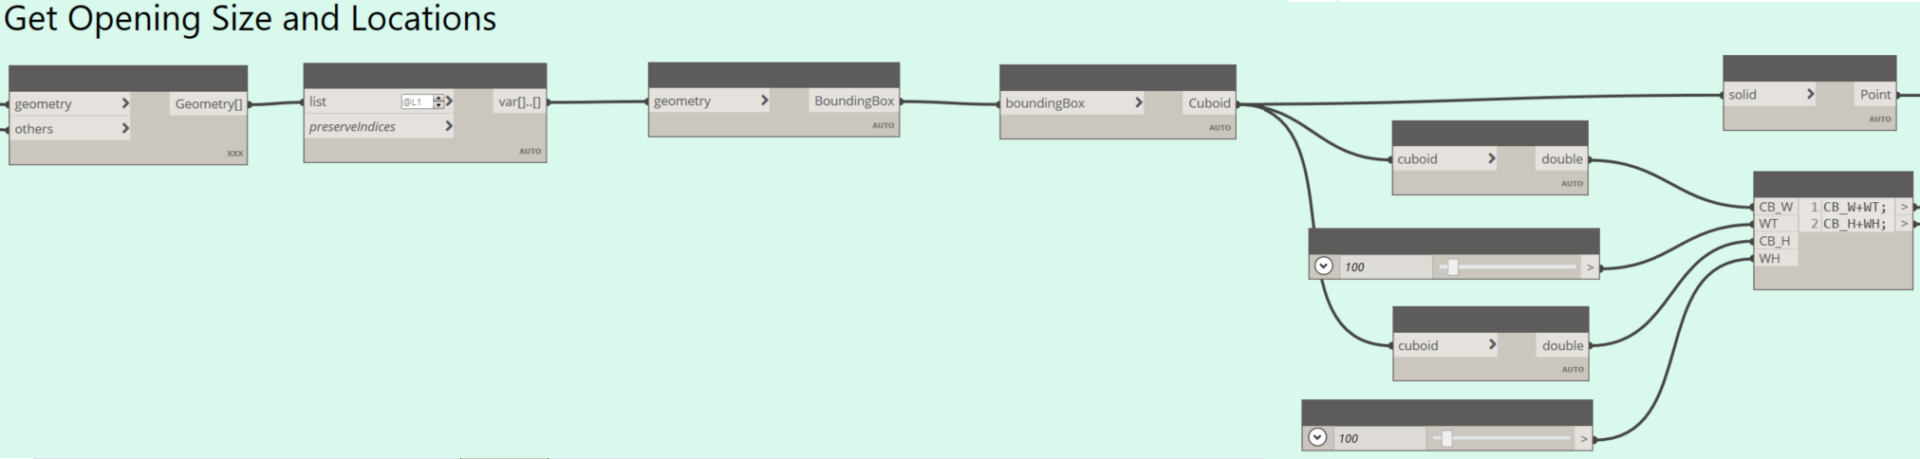
Get Size of Openings and Locations
Once I have made a list of the wall elements that match the interfering beams in order, what we have left is to extract the proper openings’ size and pinpoint the exact placement locations. Figure 7, 8.
Additionally, in this script it is possible to set free space around the openings using the parameter – you may understand as “Tolerance”, in this Dynamo I put 100 mm each for width and height.

Create the Openings
The preparation for creating an opening for beams that interfere with the walls of the host model is now complete. Only left to click the Run button on Dynamo.
Let me Run it and review the result. Figure 9
If the Dynamo script is well set up, it would be a little simpler to use Dynamo player to set the parameters needed to proceed without having to directly run Dynamo to create an opening. Figure 10

As some readers may have realized it, this beam can also be replaced such as ducts, pipes, cable trays or other elements which are elements through walls.
Furthermore, this function I introduced in this article can be utilized not only in the design stage but also in the construction stage. For example, the opening data can be used to mark all the openings on the construction drawing so that the openings can be set before wall construction, and this can be reducing unnecessary work of demolishing and re-constructing for the openings.
For more information and if want to get this Wall Opening Dynamo script or have any questions, please contact here.